Worldwide Sites
You have been detected as being from . Where applicable, you can see country-specific product information, offers, and pricing.
Keyboard ALT + g to toggle grid overlay
The Brief
“Cat Fu is a black bob-tailed cat. He is slick, cool and full of funk. He has a strong African-American voice, reminiscent of Shack—deep and ‘sexy’ sounding. He is a Kung Fu master, trained by Bruce Lee’s cat. (Did Bruce Lee have a cat?) He wears nothing but a red collar with a gold tag. The tag has the initials CF on it. Slender but muscular like Bruce Lee, Cat Fu moves with speed and grace and is a heck of a dancer. He loves both funk and disco music.”

Create a Reference Board
Based on the description of the character above, I gathered references for key design elements mentioned in the brief. This way, I can design Cat Fu to fit the background story and functionality of the character within the game environment. Having a board with all your images nearby with different key elements can speed up the thought process when drawing. Here is a reference board with key elements from the design brief. This was created using ProRef, a free and simple software found online that organizes your reference images.
It can be a good idea to create some studies of your references to really understand the visual language of a cat and the dynamic movements and poses of Bruce Lee so you can incorporate them into your design.

Find the Right Tool
A tool is only as good as the artist using it, but there are differences in software that can help an artist in different ways throughout the drawing process. In this particular tutorial I used SketchBook because it has many handy tools that I knew would help in the drafting process of this particular character. Keep in mind that as a character artist, we are often required to draw multiple views of a character (usually front, side and back) so the modeler can take your sketches and create them in 3D for the game.

Draft a Rough Sketch Using Symmetry
I used SketchBook’s symmetry tool to create the front view of the character. Since Cat Fu will be symmetrical from the front, I was able to save time by only designing half of the character while also getting a representation of how it looks mirrored. This significantly speeds up the process and keeps things organized. A beginning step would be to use this tool and roughly mark out the proportions of the character.

Refine the Sketch
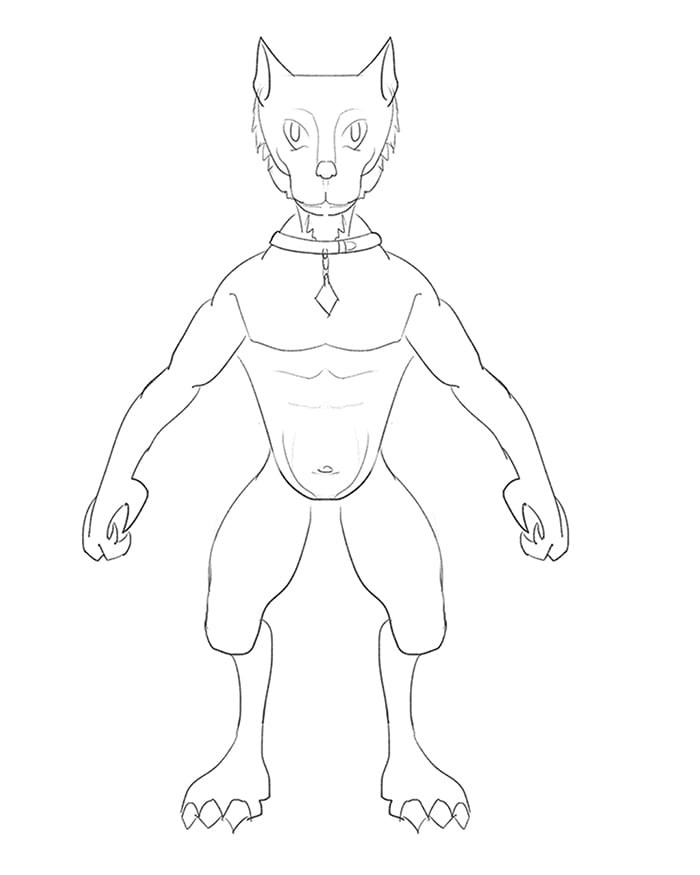
I design characters in 2D so the modelers can create in 3D. That said, I make it a point to make every line clear and show proper overall forms. From my rough outline, I created a new layer in SketchBook and used the ellipse and ruler tools to create a clearer and simpler line art over the rough sketch I did earlier. A key tool in SketchBook that can help with clean line art is the **Steady Stroke** tool. It takes the stroke of your line and averages it out to create a clean curve.

Three tools you definitely want to get to know: the Ruler, the Ellipse tool and Steady Stroke, which helps you draw very appealing lines.

Using the tools above, I was able to create cleaner line art for the Cat Fu character over my previous rough sketch.
Create a Side View
Now that the front view line art is complete, I can move on to the side view of Cat Fu. To make this process precise, I used the ruler tool (showed earlier above) to draw key landmarks across the canvas where the ear begins and ends and where the eyes begin and end on the face. Thinking within 3D space, I replicated the design from the side, thinking where the anatomy and key elements would be. Note that often the arm of the character is hidden in order to see the full side of a character. Using the same process as before, I started with a rough proportion sketch and used SketchBook’s tools to create more refined line art.

The red lines represent key landmarks on the character. Using the Ruler tool, or, by simple holding **Shift** while the brush is on the canvas, I was able to draw straight lines across.
Add Colors and Finalize the Design
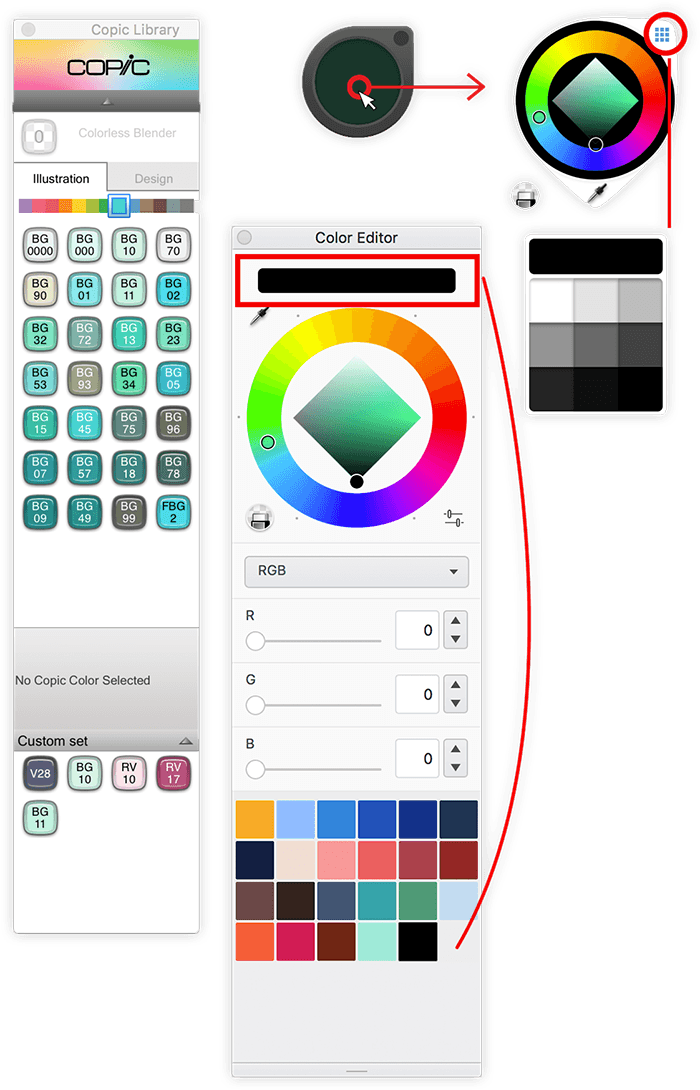
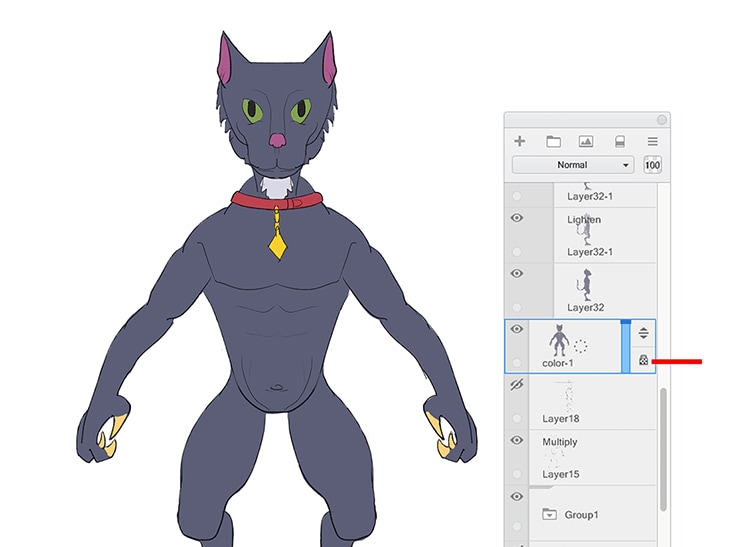
The next step was to add colors to Cat Fu. This gives the character team an idea of what possible colors the characters may have during the texturing phase after it has been 3D modeled. For this particular character, a layer was created then filled in with a solid color. I then locked it so I couldn’t accidentally paint outside the layer. This way, there is a good base that can be painted on top without going outside the lines. Below is some information about how colors work in SketchBook.
Copic Colors: The Copic Library is very unique. You have access to the Copic color line digitally. Using these with the Copic brushes, you can emulate traditional effects. There is also the option of using the colors from the Library to create your own Custom Sets near the bottom which behave in the same fashion as swatches.
Color Editor: SketchBook does a great job of combining sliders, the color wheel and swatches in one window that you can keep open at all times in your layout. The sliders in the Color Editor can be switched between RGB and HSL. Dragging the color near the top of the Color Editor window to this area adds it to your swatches.
Color Puck: SketchBook has a “portable” color tab that is smaller than the main color editor. This allows you to save UI space and drag it around for ease of use. There is a small puck which shows the color when not active. Upon clicking, you can bring up the color wheel and further bring up a value range when the icon is active on the top right.

Use the solid color fill and brightness method to create lighting and color for the character in the front and side views:

Cat Fu filled with solid colors. Next would be to add some depth and shadow

Duplicate the solid color layer two times. Change the brightness on each layer so that you have a “dark” and “bright” layer. This way you can erase away the light and darks to create lighting on the character.
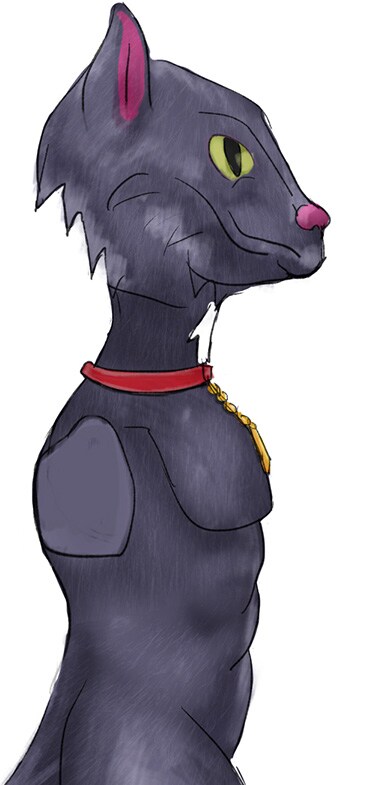
So there you have it. Cat Fu is complete and ready to be sent to the 3D modeler.

Final adjustments and adding a rough shadow near the bottom to give it a final touch and ground the character.
